This activity is based on the Learn ArcGIS lesson:
Calculate Impervious Surfaces from Spectral Imagery. It utilizes AcrGIS Pro to familiarize users with Value Added Data Analysis. This lesson uses aerial imagery, like that collected with UAS, to classify surface types. It ultimately creates a layer that describes that impervious surfaces of a study area.
Methods
The data used is available from the lesson.
Segment the imagery
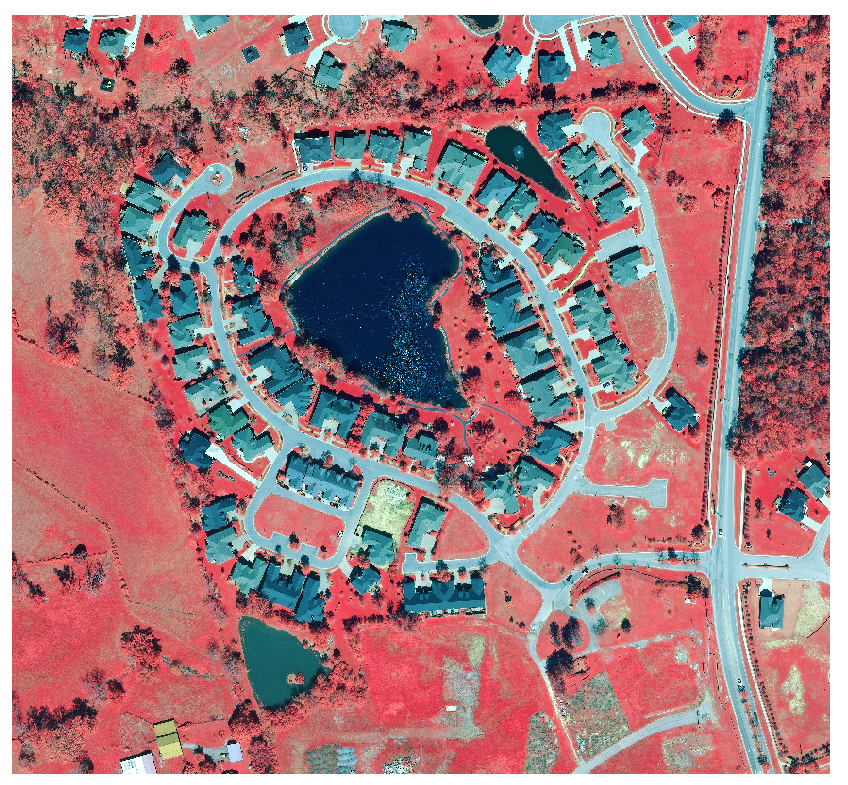
Users open up the existing Surface Impervious project first. The "Calculate Surface Imperviousness" tasks are used in this lesson. The first step is to extract the bands to create a new layer (Figure 1).
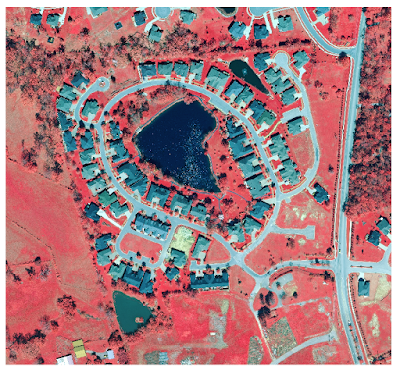 |
| Figure 1: Bands 4 1 3 are extracted to create a layer such as the image above. |
The next step is to group similar pixels into segments of image using the "Segment Mean Shift" Task. The parameters of Figure 2 are filled into the task to create a new layer (Figure 3).
 |
| Figure 2: Parameters used to create a segment mean shifted layer. |
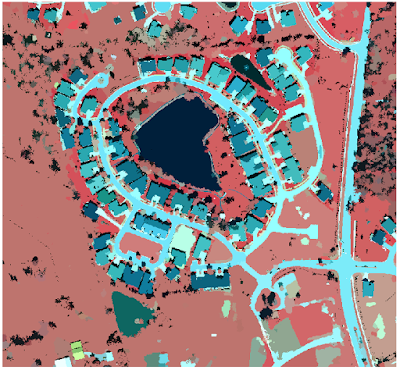 |
| Figure 3: Result layer of the segment mean shift task. The pixels that are alike are grouped together. |
Classify the imagery
The last section segmented the image to makes classification easier. This section classifies all of the different pervious and impervious surface types into distinct categories. Figure 4 shows many different segments of the image classified into 7 classes. All of the samples are grouped into like classes such as: gray roofs, water, roads, driveways, grass, bare earth, and shadows.
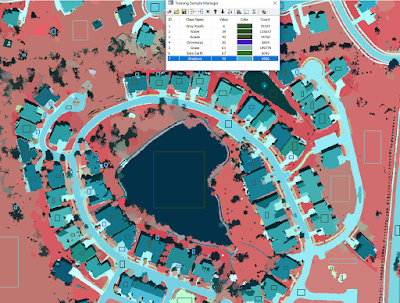 |
| Figure 4: Different spectral classes help to distinguish pervious and impervious surfaces. |
The classification samples are then saved as an individual file to use in training the classifier. The neighborhood raster is compared against the sample file to create a classified image (Figure 5).
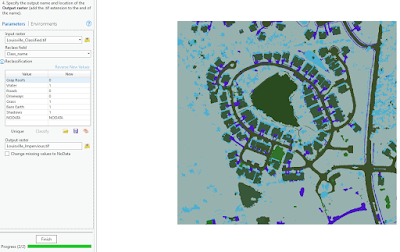 |
| Figure 5: The study neighborhood classified into the seven different classes. The left column shows the parameters for the next step completed |
After the image is classified, a field is added to further classify the image into pervious and impervious classes as either 0 or 1 (Figure 5). The task is run to create an output of either pervious or impervious surfaces (Figure 6).
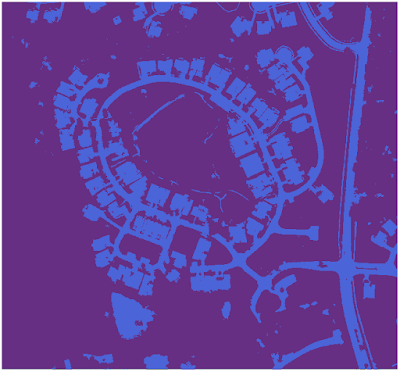 |
| Figure 6: The dark purple segments are all pervious surfaces, while the impervious surfaces are all light purple. |
Calculate the impervious surface area
One-hundred accuracy points are created using an equalized stratified random process. The first ten of the points are analyzed and classified based upon the surface type they lie upon (Figure 7). The task is run to create a table which can be used in the lesson.
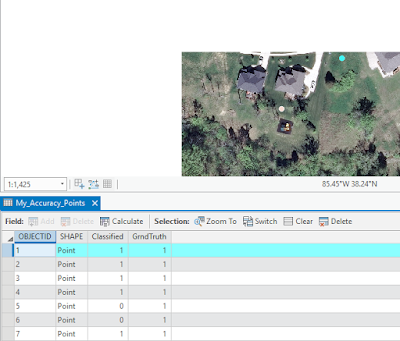 |
| Figure 7: The highlighted point is classified into 1 for pervious or 0 for impervious surface type. |
A confusion matrix is used in the next step. This computes the accuracy between the classification and the accuracy assessment tasks. If both are classified as impervious, then the matrix will have a high percentage (Figure 8). The next step runs a tabulate area process on the parcels to assess the imperviousness level within each one.
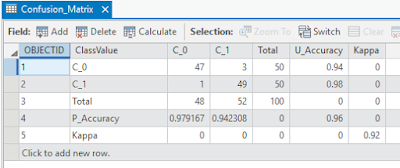 |
| Figure 8: Confusion Matrix. U_Accuracy is user accuracy, P_Accuracy is producer accuracy, and Kappa is the final computed percentage overall. |
The final step of the lessons is the join the Impervious Area table (Figure 9) with the parcel table to symbolize the parcels based upon the different levels of imperviousness.
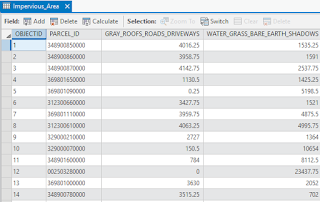 |
Figure 9: The tabulated area table of imperviousness within each parcel.
|
Results
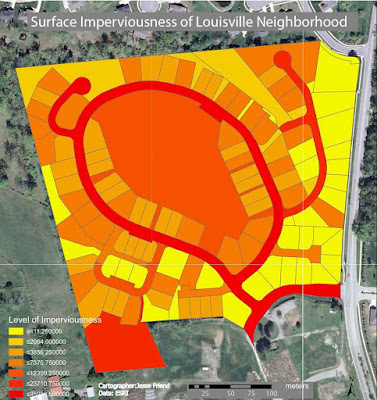 |
| Figure 10: The final result of the surface imperviousness tasks ran through the lesson. The darker the shade, the more impervious surface within that parcel. |
The final results were very successful. The map that I was able to make in the lesson imitates the real impervious levels within the initial raster image very well. The roads are the best example of this. Every single black top displays on the map as extremely dark red. The grass is the most pervious, and is displayed as the lightest yellow.
Some difficulties encountered in this activity were all the result of ArcGIS Pro. It is extremely difficult to make a layout in ArcGIS pro. I couldn't figure out how to change the units on the scale bar, change the decimals on the legend, or even export it as a jpeg. The ESRI help was little help at this point too. I ended up printing the image to a pdf, and going into Adobe Illustrator to manually change the units from kilometers to meters and I was able to export as a jpeg there.
Conclusion
ArcGIS Pro is a very robust software program that can run Value Added Data Analysis very well. It is the future of ESRI, and they have been slowly rolling it out. It is still being improved, so within the next few years, it should run as smooth as the current ArcMap. The resulting map for the lesson was accurate, and accomplished the task. I could imagine using this with UAS data to create well done maps for clients.


No comments:
Post a Comment